Campfire Gourmet: 5 Simple, Delicious Recipes for Your Miller’s Family Camp Cookout
There is something undeniably primal and magical about food cooked over an open fire. Maybe it’s the fresh air rolling off Miller Lake, the scent of cedar trees baking in the sun on the Bruce Peninsula, or just the sheer satisfaction of feeding a hungry crew after a long day of hiking the trails.
At Miller’s Family Camp, we believe that the campfire is the true heart of the campsite. It is the place where the day’s adventures are recounted, where wet socks are dried, and where the best memories are made. But let’s be honest: cooking in the woods can sometimes feel like a chore. Between managing the fire, balancing plates on your lap, and trying not to burn the sausages, it can be stressful if you aren’t prepared.
Many campers fall into the trap of relying solely on hot dogs and canned beans. While those are classics for a reason, your camping diet doesn’t have to be boring. In fact, with a little bit of preparation and the right mindset, you can enjoy “Campfire Gourmet” meals that rival your favorite takeout, all cooked right at your site.
We have curated a list of 5 easy, family-approved recipes designed to elevate your next cookout at Miller’s. These meals are low-stress, high-flavor, and designed to get you out of the “kitchen” and back to enjoying the lake.
The Camp Chef’s Toolkit: Essentials for Success
Before we dive into the recipes, let’s talk gear. You don’t need a professional chef’s kitchen to cook great food, but having a few key items will make your life infinitely easier.
- Cast Iron Skillet: This is the undisputed king of camp cooking. It retains heat incredibly well, can go directly over a grate or into the coals, and is nearly indestructible. If you bring only one pan, make it cast iron.
- Heavy-Duty Aluminum Foil: Do not buy the cheap stuff. “Heavy Duty” is essential for making foil packets (hobo packs) that won’t rip when you flip them with tongs.
- Long-Handled Tongs: You want to keep your knuckles away from the heat. A sturdy pair of long tongs is crucial for moving food and adjusting burning logs.
- Heat-Resistant Gloves: These are a game-changer. They allow you to move a hot grate or adjust a cast iron pan without fumbling for a potholder that might catch fire.
Now that you are geared up, let’s get cooking.
1. The “Rise and Shine” Campfire Hash
They say breakfast is the most important meal of the day, and that is doubly true when you are camping. If you are planning a trip to Flowerpot Island or a hike along the Bruce Trail, you need fuel. This one-skillet breakfast is hearty, protein-packed, and saves you from washing a dozen different pots and pans.
Why we love it: It utilizes frozen hash browns, which act as extra ice in your cooler until you are ready to use them!
What You Need:
- 1 bag of frozen cubed hash browns (thawed slightly).
- 1 package of pre-cooked breakfast sausages (sliced into coins) or bacon (chopped).
- 1 green bell pepper, diced.
- 1 red bell pepper, diced.
- 1 large yellow onion, diced.
- 6-8 large eggs.
- 1 cup shredded cheddar or marble cheese.
- Oil or butter for frying.
- Salt, pepper, and garlic powder.
How to Cook It:
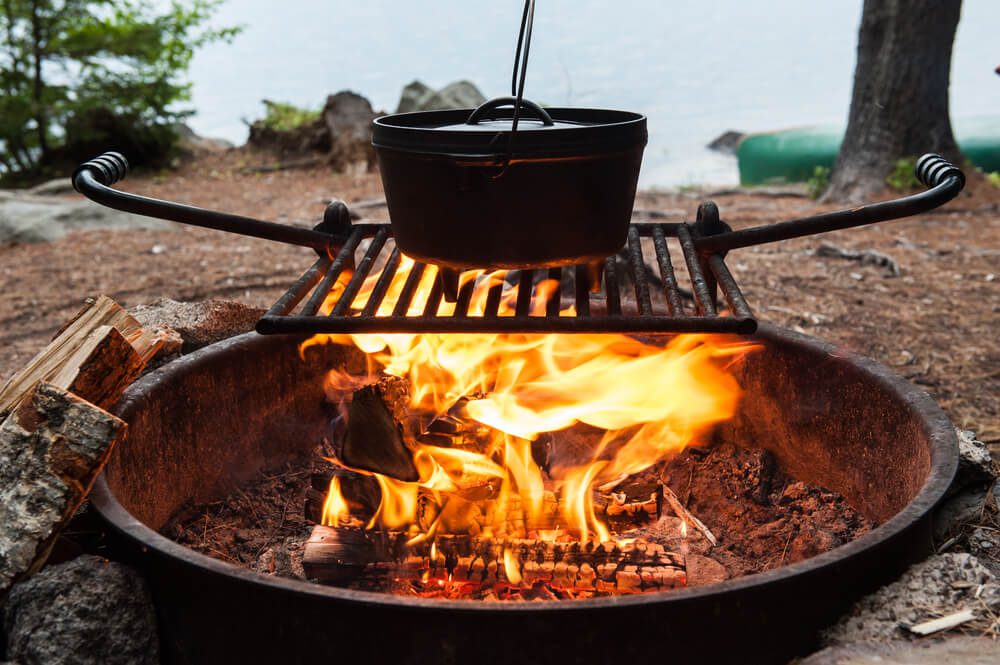
- Get the Fire Ready: You want a nice bed of hot coals and a sturdy grate. If using a camp stove, set it to medium-high.
- Crisp the Potatoes: Heat your oil in the cast iron skillet. Add the onions and peppers first, sautéing until soft. Then, add the hash browns. Let them sit undisturbed for a few minutes to get that golden-brown crust.
- Add the Meat: Toss in your sliced sausage or bacon. Since the sausage is pre-cooked, you’re just warming it up and mingling the flavors.
- The Egg Wells: This is the fun part. Using a spoon, create little “wells” or holes in the potato mixture. Crack an egg into each well.
- Steam and Melt: Cover the skillet (use a lid or a sheet of foil). Let it cook for about 5-8 minutes until the egg whites are set but the yolks are still soft.
- The Finish: Remove the cover, sprinkle generously with cheese, and let it melt. Serve immediately with toast or ketchup!
2. DIY Campfire Pizza Pockets
If you are camping with kids, this recipe is a non-negotiable. It transforms dinner into an activity. Everyone gets to be their own chef, which means fewer complaints about “I don’t like mushrooms” or “I wanted extra pepperoni.”
Why we love it: It creates that distinct wood-fired pizza taste without needing a fancy brick oven.
What You Need:
- Pita bread (the pocket style) OR pre-made pizza dough tubes.
- 1 jar of pizza sauce.
- 1 bag of shredded mozzarella cheese.
- Toppings: Pepperoni slices, cooked crumbled sausage, diced peppers, mushrooms, olives, pineapple (if you’re adventurous!).
- Heavy-duty aluminum foil.
- Cooking spray or olive oil.
How to Cook It:
- Prep the Crust: If using pita, slice a small opening and gently open the pocket. If using dough, stretch it out into a rough circle.
- Stuff It: Spread a spoonful of sauce inside (don’t overdo it, or it gets soggy!). Stuff with cheese and your chosen toppings.
- Wrap It Up: If using dough, fold it over like a calzone and pinch the edges shut. If using pita, just keep it upright.
- Foil Time: Tear off a large square of foil. Spray it with a little oil to prevent sticking. Wrap the pizza pocket tightly. Pro Tip: Double wrap it if you are placing it directly near coals.
- The Cook: Place the foil packets on the grate over the fire (not directly in the roaring flames). Cook for about 10–15 minutes, flipping halfway through.
- The Reveal: Unwrap carefully (steam burns are real!) and enjoy the melty goodness.
3. The Ultimate “Walking Taco”
This is the ultimate low-mess camping meal. It is fun, interactive, and requires almost zero cleanup—which is a parent’s dream when you are living out of a cooler. It’s also a great lunch option if you are taking a break at the campsite between swimming sessions in Miller Lake.
Why we love it: No plates to wash!
What You Need:
- Single-serve bags of corn chips (Fritos or Doritos work best).
- 1 lb ground beef or turkey.
- 1 packet of taco seasoning.
- Toppings: Shredded lettuce, diced tomatoes, salsa, sour cream, shredded cheddar cheese, jalapeños.
Prep Ahead Tip:
Cook the taco meat at home before you leave for your trip! Brown the meat, add the seasoning, and let it cool. Store it in a Ziploc bag or container in your cooler. This saves you from dealing with raw meat safety and grease disposal at the campsite.
How to Cook It:
- Reheat the Meat: Dump your pre-cooked meat into a pot or skillet over the camp stove or fire grate. Add a splash of water if it looks dry and stir until piping hot.
- Prep the Chips: Take a bag of chips and gently crunch them up while the bag is still sealed. You want bite-sized pieces, not dust.
- Open and Fill: Cut the chips bag open along the top (or down the side for a wider bowl). Ladle a generous scoop of hot meat directly into the bag.
- Top It Off: Set up a “topping bar” on the picnic table. Let everyone add their cheese, lettuce, salsa, and sour cream right into the bag.
- Eat: Grab a fork, mix it up, and eat it right out of the bag. When you’re done, the empty bag goes in the trash. Easy.
4. Sweet & Savory Ham and Pineapple Skewers
Channel a little tropical vibe right here in Ontario. These skewers are colorful, healthy, and incredibly easy to assemble. They offer a sophisticated flavor profile that breaks up the monotony of burgers and hot dogs.
Why we love it: The fire caramelizes the natural sugars in the pineapple, creating a sweet, smoky flavor that pairs perfectly with the salty ham.
What You Need:
- 1 thick ham steak, cubed (about 1-inch pieces).
- 1 fresh pineapple, peeled and cubed (canned chunks work too, but fresh holds up better on the grill).
- 1 red onion, cut into chunks.
- 1 green bell pepper, cut into chunks.
- BBQ sauce or Teriyaki glaze.
- Wooden or metal skewers.
How to Cook It:
- The Soak: If you are using wooden skewers, soak them in water for at least 30 minutes before cooking. This prevents the wood from catching fire and burning your dinner into the ashes.
- Thread the Needle: Alternate the ingredients on the skewer: Ham, pineapple, onion, pepper. Repeat.
- The Glaze: Brush the skewers generously with your sauce of choice.
- Grill: Place the skewers on the grate over medium heat. You want a sizzle, not an inferno.
- Turn and Baste: Rotate the skewers every 2-3 minutes. Brush with more sauce each time you turn them.
- Serve: Cook until the veggies are tender-crisp and the ham has nice char marks (about 10-12 minutes total). Serve over instant rice or just eat them off the stick!
5. Banana Boat Supremes
Move over, s’mores! While we love the classic graham cracker treat, sometimes you want something a little more decadent. Banana Boats are like a warm, gooey banana split.
Why we love it: You can customize them endlessly, and it helps use up bananas that might be getting a little brown in the heat.
What You Need:
- Ripe bananas (one per person).
- Chocolate chips (milk or semi-sweet).
- Mini marshmallows.
- Optional: Peanut butter chips, crushed graham crackers, caramel sauce, strawberries, coconut flakes.
How to Cook It:
- The Surgery: Leave the peel on the banana! With a knife, slice the banana lengthwise along the inner curve. Cut through the peel and the fruit, but do not cut through the bottom peel.
- The Stuffing: Gently pull the banana slightly open to create a pocket. Stuff the chocolate chips, marshmallows, and other toppings deep inside the slit.
- Wrap It: Wrap each banana individually in foil.
- Bake It: Place the foil packets into the warm embers of your fire (or on the grate). You don’t want active flames here, just heat.
- The Wait: Let them cook for about 5–10 minutes.
- Devour: Remove with tongs. Carefully open the foil. The chocolate and marshmallows should be melted, and the banana soft and spoonable. Eat it with a spoon right out of the peel!
Safety First: A Happy Camper is a Safe Camper
Cooking outdoors is a joy, but it comes with responsibilities. At Miller’s Family Camp, we are situated in a beautiful natural environment, and we want to keep it—and you—safe.
Fire Safety
Always build your fire in the designated fire pits provided at your site. Keep a bucket of water or sand nearby, and never leave a fire unattended, even for a minute. Wind on the Bruce Peninsula can pick up quickly. For excellent tips on teaching kids about fire safety, check out this guide from the Ontario Parks Blog.
Wildlife and Food Storage
We share the woods with local wildlife, including raccoons, chipmunks, and occasionally black bears. The smell of cooking food is irresistible to them.
- Never bring food inside your tent.
- Clean up immediately after eating. Do not leave dirty plates or the grease trap on your BBQ unattended.
- Store food in your vehicle or a locked hard-sided cooler.
The Government of Canada offers great advice on how to store and prepare food safely in the summer heat to prevent spoilage and unwanted animal visitors.
Ready to Fire Up the Grill?
Whether you are a seasoned camper with a chuck box full of spices or a first-timer renting one of our cottages, Miller’s Family Camp offers the perfect backdrop for your outdoor culinary adventures.
There is no seasoning quite like fresh air and woodsmoke. We hope these recipes inspire you to try something new on your next visit.
Contact us today to book your stay and start planning your menu! We can’t wait to see what you cook up.